Scrudlums are one of my favorite plush creations! Furry, grumpy, Muppet-y, they are truly my spirit animal (monster). Here's a look at how they are made!
First, I create a textured fur by boiling it (see my previous blog post for that tutorial!) Once the fur dries completely, I lay it out with the backing facing up and trace out the various fur pattern pieces. The body, top head, bottom and tail are all made out of fur fabric.
Using a razor blade, I cut the the pattern pieces making sure to only cut the backing of the fur and not the actual fur fibers.
The hands/arms and legs/feet are made of polar fleece, preferably the anti-pill variety. I trace out the pattern pieces using a Sharpie and cut them out using a rotary cutter.
Next, I use quilter's pins to pin the the two fabric sides together to prepare for machine stitching.
Following the outline, I straight stitch the hand pieces.
After stitching, I trim away the excess fabric, making sure not to cut too deeply between the fingers!
Using a long, thin screwdriver, I stuff the fingers and palm with polyester fiber-fill.
After I've stitched and stuffed the hands, I repeat the process for the legs/feet. Once the feet are stuffed, I use strips of batting to fill out the legs and arms.
I cut the batting double the width of the arm and leg and fold the batting over. Using the same screwdriver, I gently guide the batting down the arms and legs.
Next, I pin and stitch the fur tail.
Once stitched, I turn the fail right-side out and then trim away the fur at the base of the tail to making stitching to the body section easier.
The nose is made from a different color polar fleece. It is traced out, pinned and stitched, turned and stuff with fiber-fill.
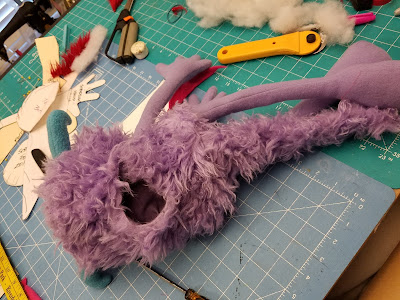
The nose and arms are guided through corresponding holes in the fur body section. They are pinned in place and ready to be stitched.
Stitching the arm detail.
After the arms and nose are stitched in place, I pin and stitch the back seam, leaving a section in the middle open. This open section will allow the Scrudlum to be turned right side out.
Now I pull the arms through the opening in the back and prepare to stitch the bottom, including the legs and tail.
The bottom pinned in place, ready to be stitched. The tail and legs have been fed through the opening in the back.
Like the nose, the horns are made from a different color polar fleece. They are traced, cut, stitched along the outline and excess fleeced trimmed away.
I lightly stuff the horns to give them some definition.
The top of the head is pinned in place with the horns in position.
Once stitching on the top is complete, I turn the Scrudlum right side out.
Using the hole in the back, I stuff the body full of polyester fiberfill.
Using a ladder stitch, I sew the foot up to the leg to create the ankle.
Stitched feet detail.
To create the definition of toes, I use a long needle and button thread to stitch through the feet.
With the body stuffed and the toes stitched, I close up the back seam using a curved needle and a ladder stitch.
For the eyes, I use plastic soup spoons. I cut off the ends on a band saw and round off the edges on a belt sander.
I cover the eyes with a white spandex fabric. This gets hot glued on the concave side of the spoon.
I use another color of polar fleece for the eye bags.
The bags are hot glued to the backs of the eyes.
Because the eyes should be glue as close to the backing of the fur as possible, I use embroidery scissors to trim away the fur fibers where the eyes will be placed.
With the fur trimmed, the eyes are hot glued in place.
Pupils are made from flocked black-out paper. This is normally used by photographers, but it's great for puppet eyes! I have circle punches in a variety of sizes. For Scrudlums, I use a 5/8" circle punch.
Pupils are securely glued in place.
I trace and cut the uni-brow from a long pile black fur fabric. Again, trace and use a razor blade to cut the backing, not the fur fibers. I use a white color pencil to trace pattern pieces on darker fabric.
The uni-brow is then glued into place.
Ta-DA!! All done and in need of a hug! Or an ice cream cone! Or a balloon! Or just a word of encouragement!
Check out more Scrudlums and other critters in the All Hands Productions Etsy store:


